The Bear: A Walkthrough
My final project in this semester's printmaking class was an exploration of memory. The prompt called for a piece based on a visual narrative from my childhood. I generally consider my memory as poor and unreliable, but when my past does linger, it sticks around in short overexposed movie clips and golden voices. I was excited for this exploration.
I chose to do one long print about the first time I saw a bear in the mountains. It was the sort of scene you wouldn't expect to forget. I wanted to do an etching so I could capture the fine details of the moment. The final product was 10"x 100" long, which is a more elegant proportion than your mind is going to picture. I chose this strip format so that I could highlight the story-like aspect of my encounter with the bear. Because of the dimensions and the media, I had to do a lot of planning and improvising with the physical materials.
A teaser: plate 6/10
I saw the bear, a large black bear, outside our family's cabin in Red River, New Mexico. Our aptly named dog, Scout, proclaimed danger with her "bear bark" just as dusk began to settle. The bear bark was a mix of a high wail and a gruff guttural sound that she reserved exclusively for mammals six times her weight. Every time since, that bark has sent my heart running laps.
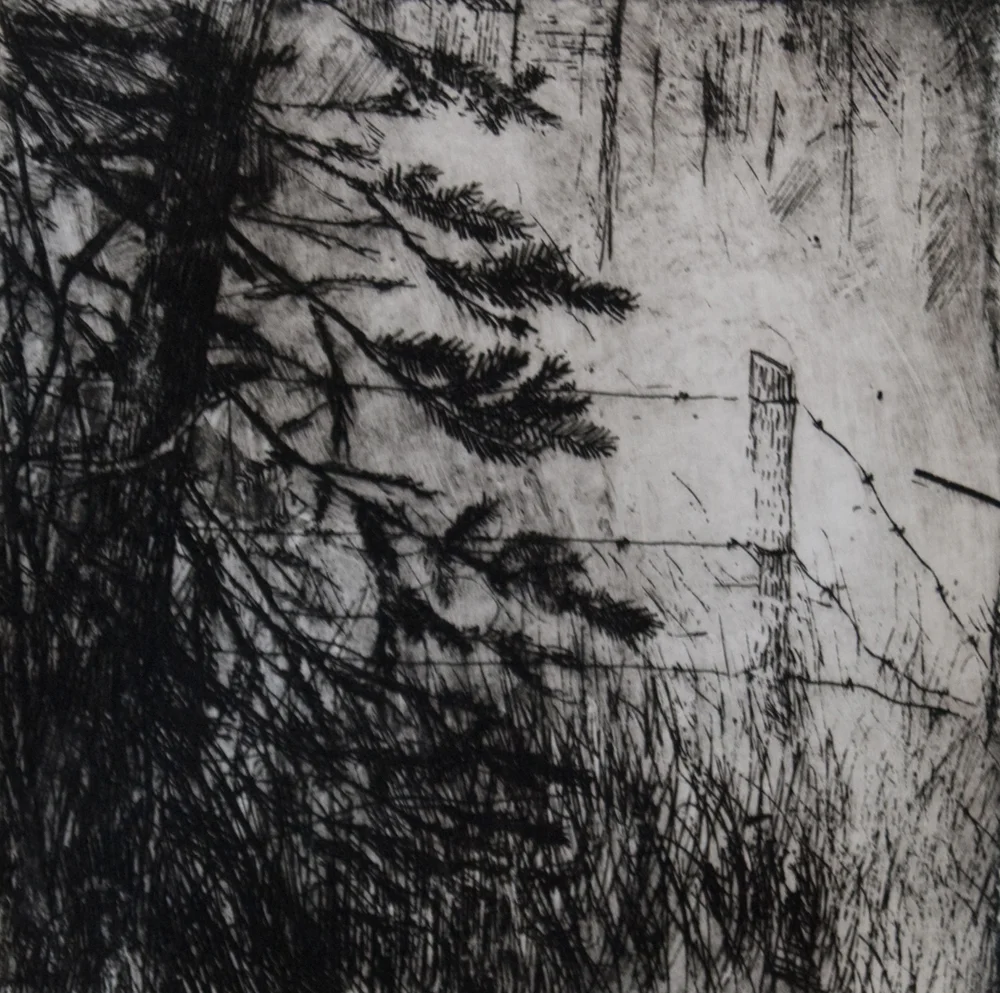
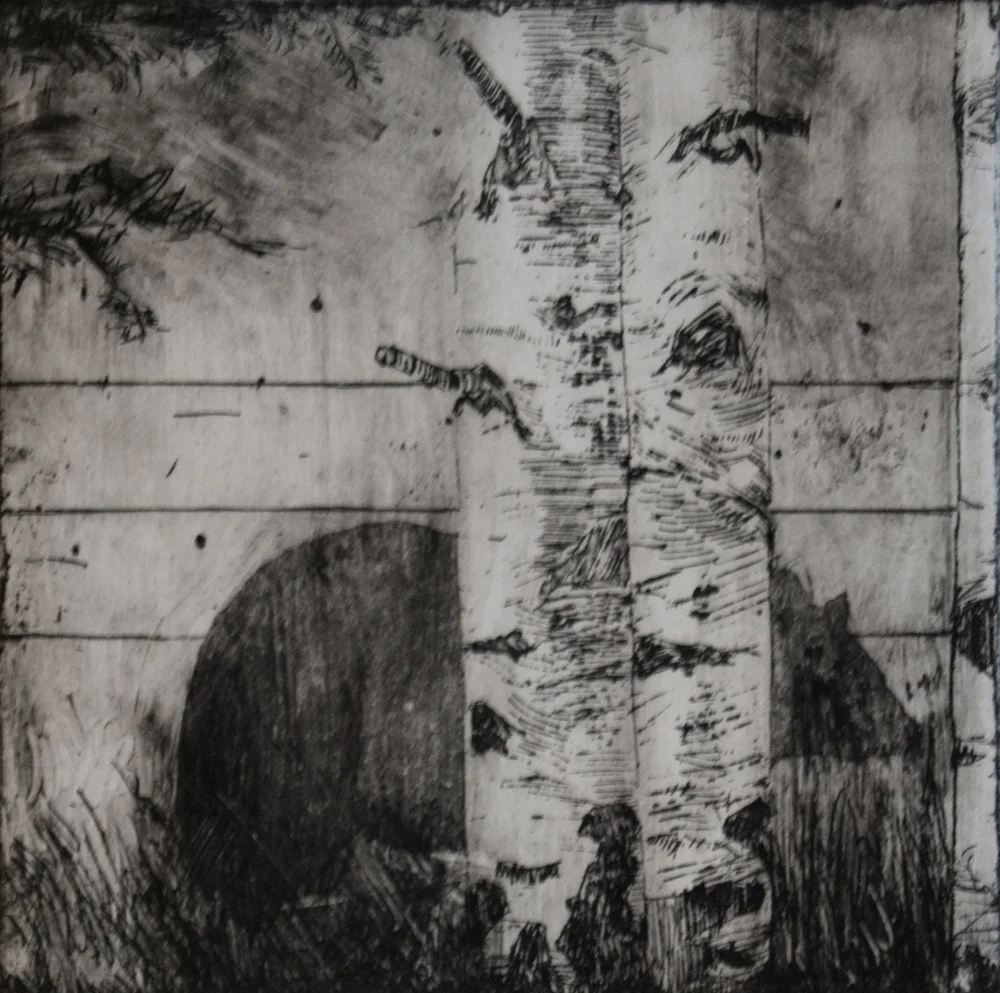
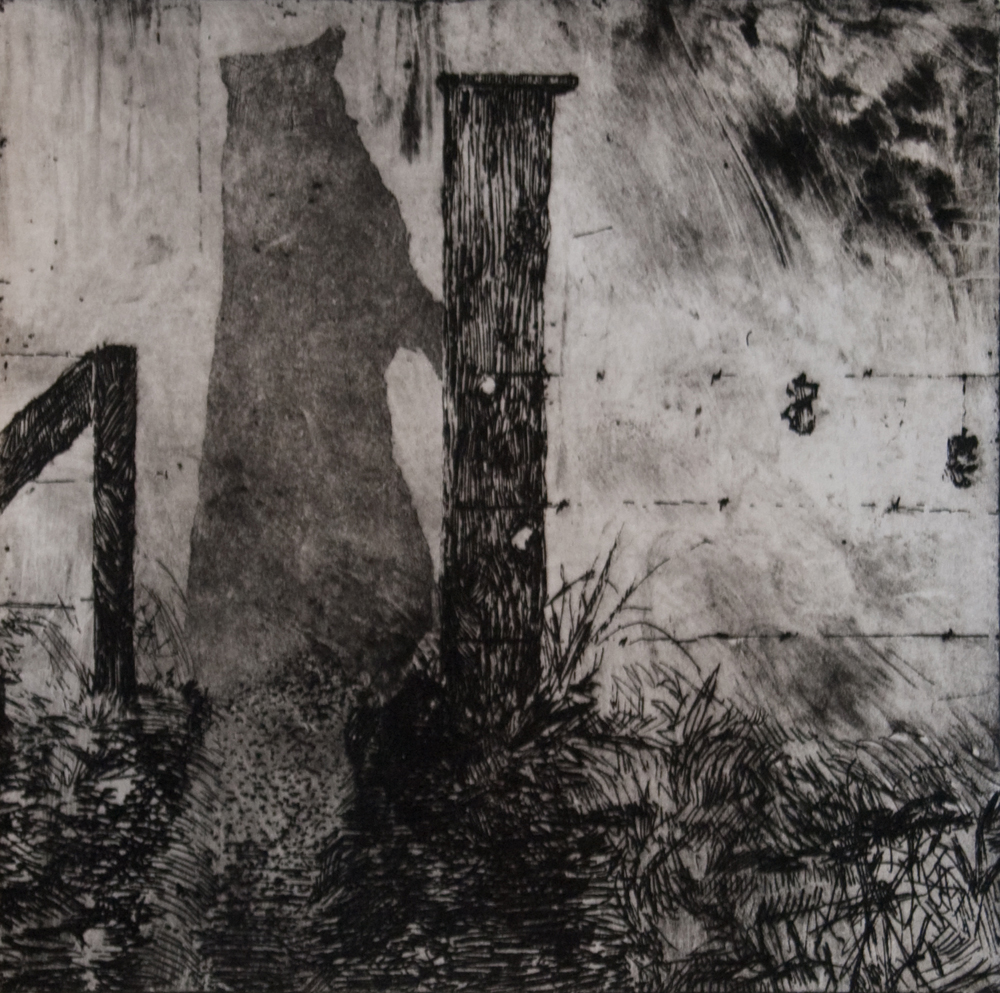
On her signal, my family gathered safely behind the back windows and watched as the bear ambled along a barbed wire fence. In the finished print, the 10 plates each capture some part of the bear along the fence. I don't remember how the bear looked so much as how much it made me feel.
I turned to my uncle, a photographer, for pictures of the space around the cabin. It was important to me to try to reconstruct my memory by including plants and details from the environment; if you look closely in one of the plates you may be able to spot the stinging nettle that was the bane of my forest excursions.

Photos by Steve Burkett, wildlife provided by The Carson National Forest.
Photos in hand, I began sketching. I isolated moments in time that I wanted to bring alive. I referenced photos of plants in the area. I played with several compositional formats. I loved the idea of a series of small scenes, each on its own plate. That is what led to my final format. I chose ten zinc plates, each 4" x 4". Each plate was large enough for a detailed scene, but not large enough to stand alone. I believed (with very little evidence) that I could find a way to print them all on the same sheet of paper. The ten pictures would work together, each informing the other ones. Sketches complete, I began to prepare the materials for my etching.
A little about etching. At its most basic form, etching is a process in which an image is cut into a metal plate so that those incisions can be filled with ink and printed. In etching, acid does the dirty work. First, a zinc or copper plate is covered with a thin layer of chemical (a ground) from the acid's dissolving power. Then the artist scrapes away parts of the ground, revealing the metal beneath. The plate is submerged in an acid bath for a short time, and tiny grooves are created (this is called the bite) wherever the metal was unprotected. The remaining ground is cleaned off plate, and then the artist spreads ink all over the plate. The ink is wiped off the surface and the plate is run through a press at high pressure. Paper is pushed into the grooves of the plate, collecting the ink and making the print.
To prepare for this, I cut two 9" x 12" zinc plates into 10 squares, each of them 4" x 4". My classmates and I carefully tore the 10" x 100" strip from a long roll of Rives BFK paper. I then covered the plates with a hard ground.
After that, I etched each plate with sharp needles. You can see below the silver lines where I've etched. The acid will eat into the exposed silver parts and create a groove where ink can rest.
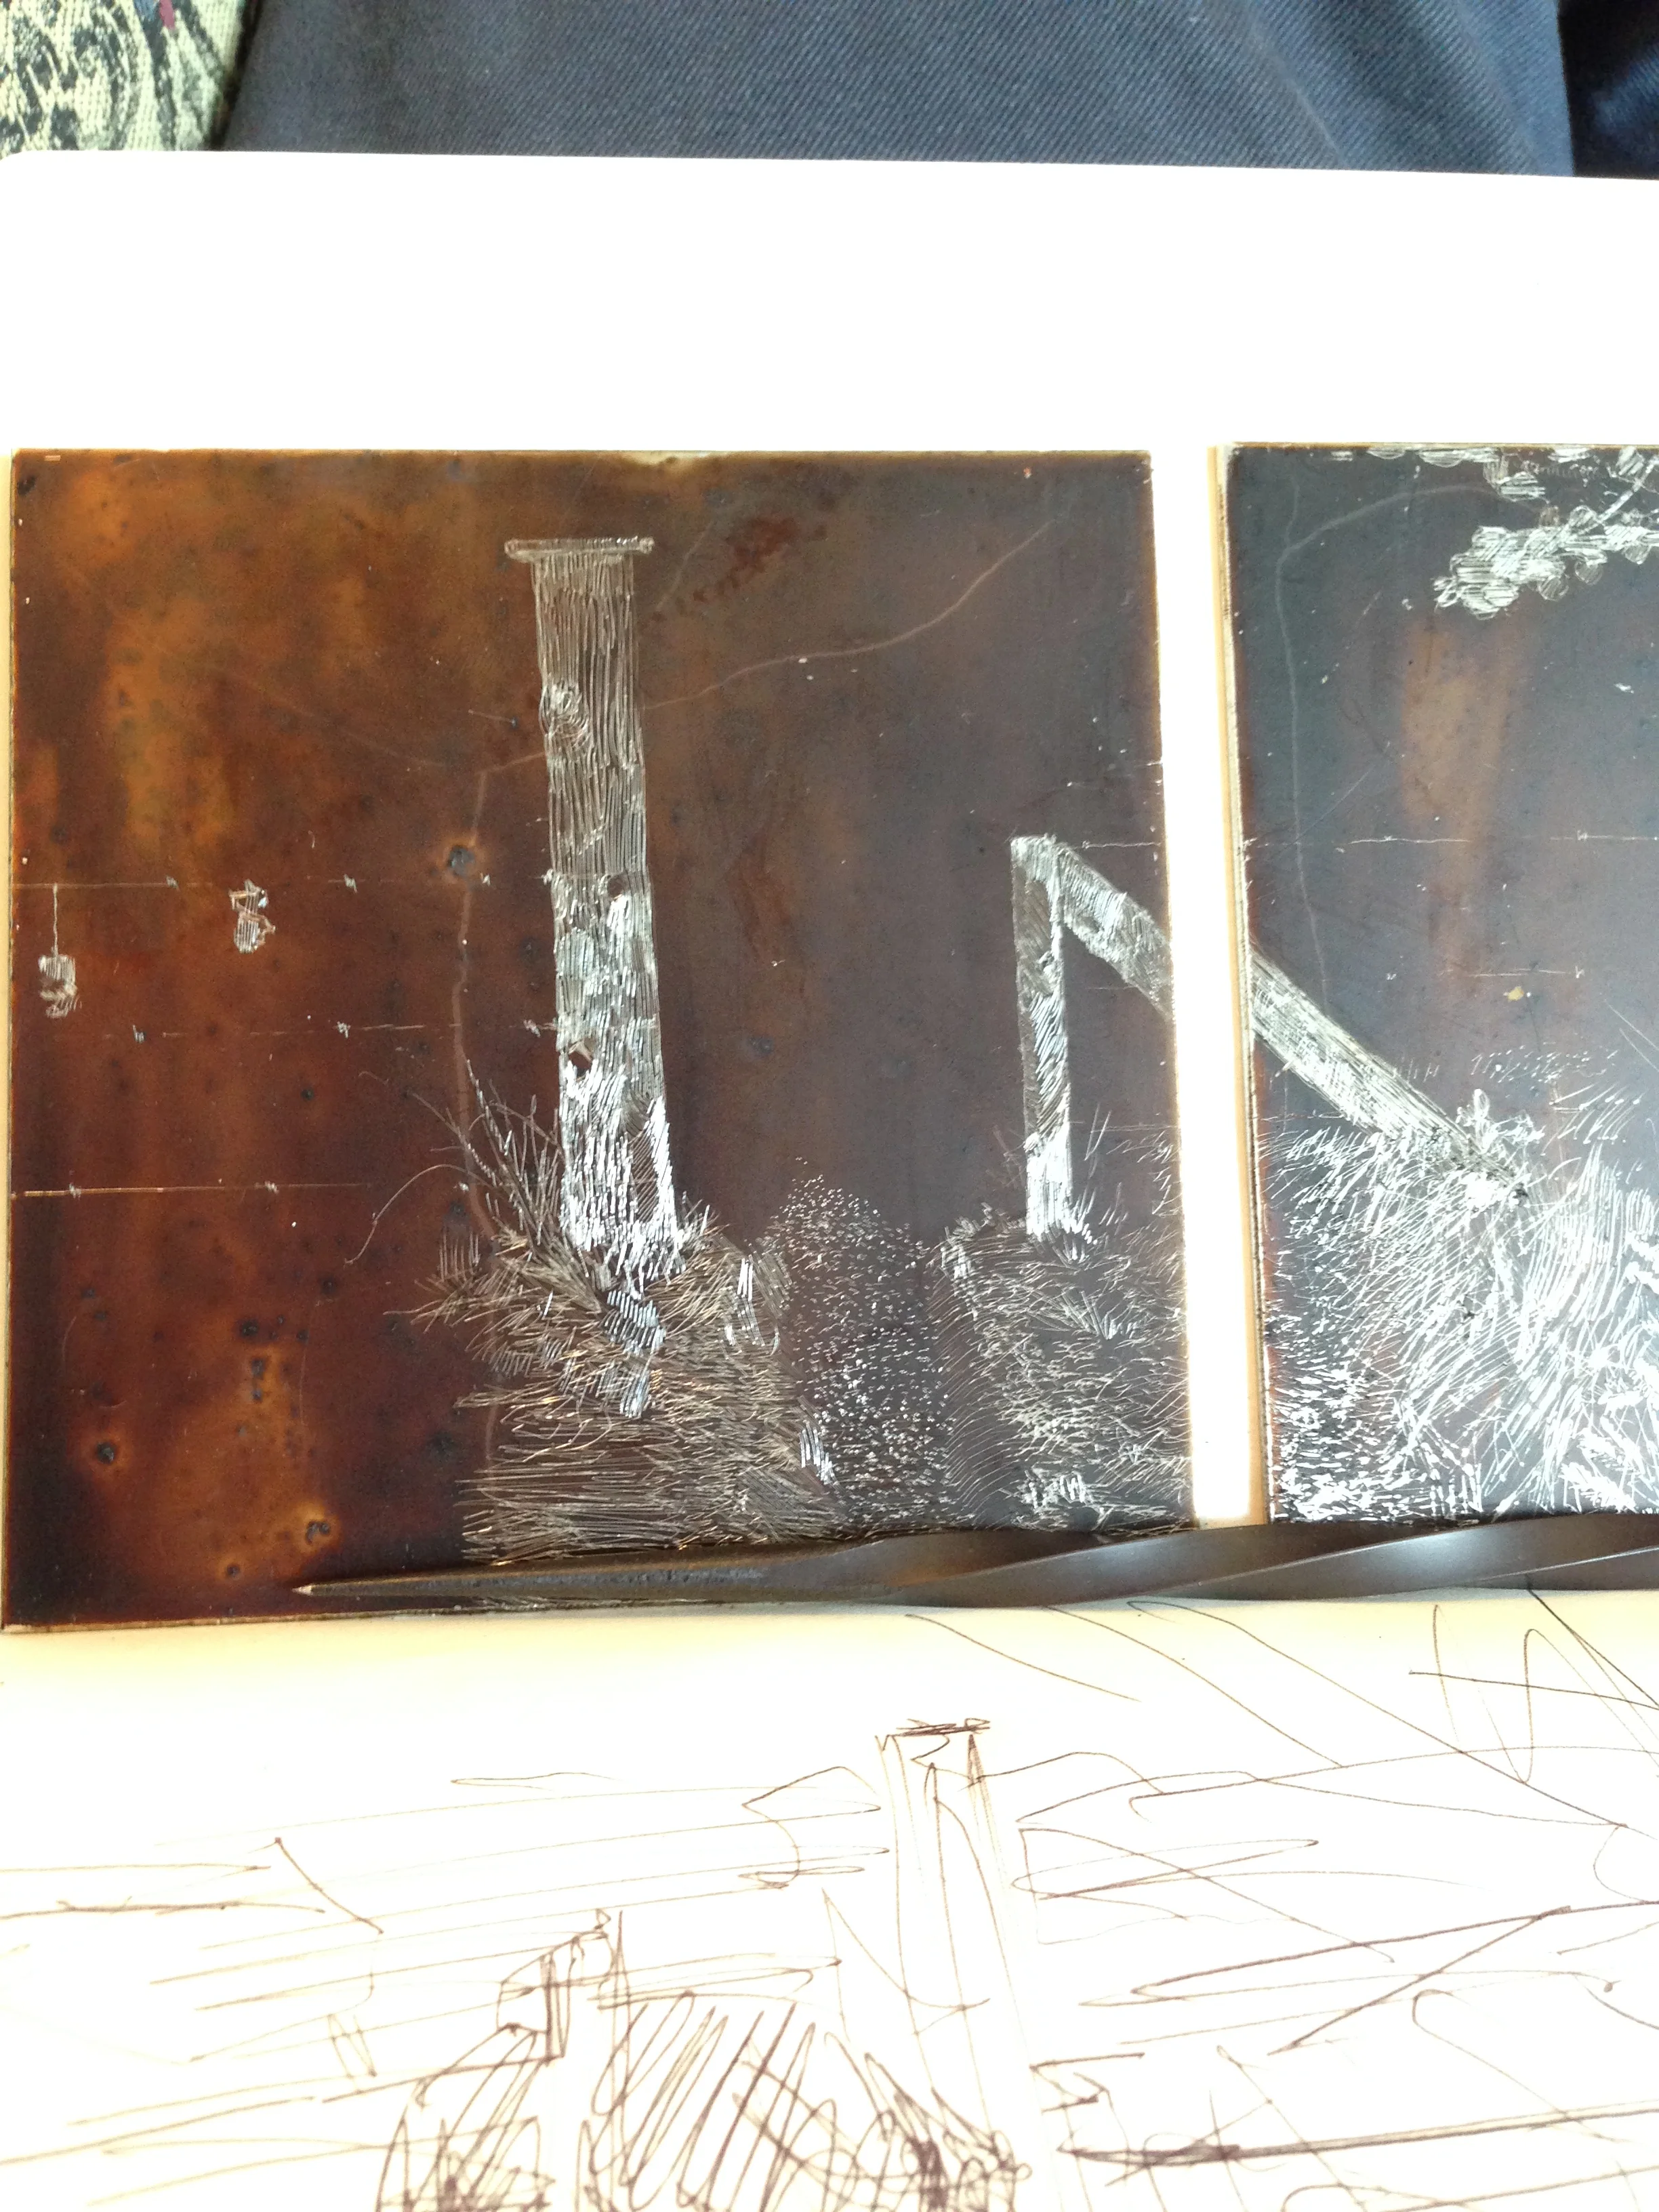
The brown is the hard ground, and the spiral death tool is one of my needles.
I soaked the finished plates into a solution of nitric acid and water for about an hour. Air escapes from the zinc and rests on the plate, which means I have to brush off air bubbles with a turkey feather every now and then to let the acid do its job.
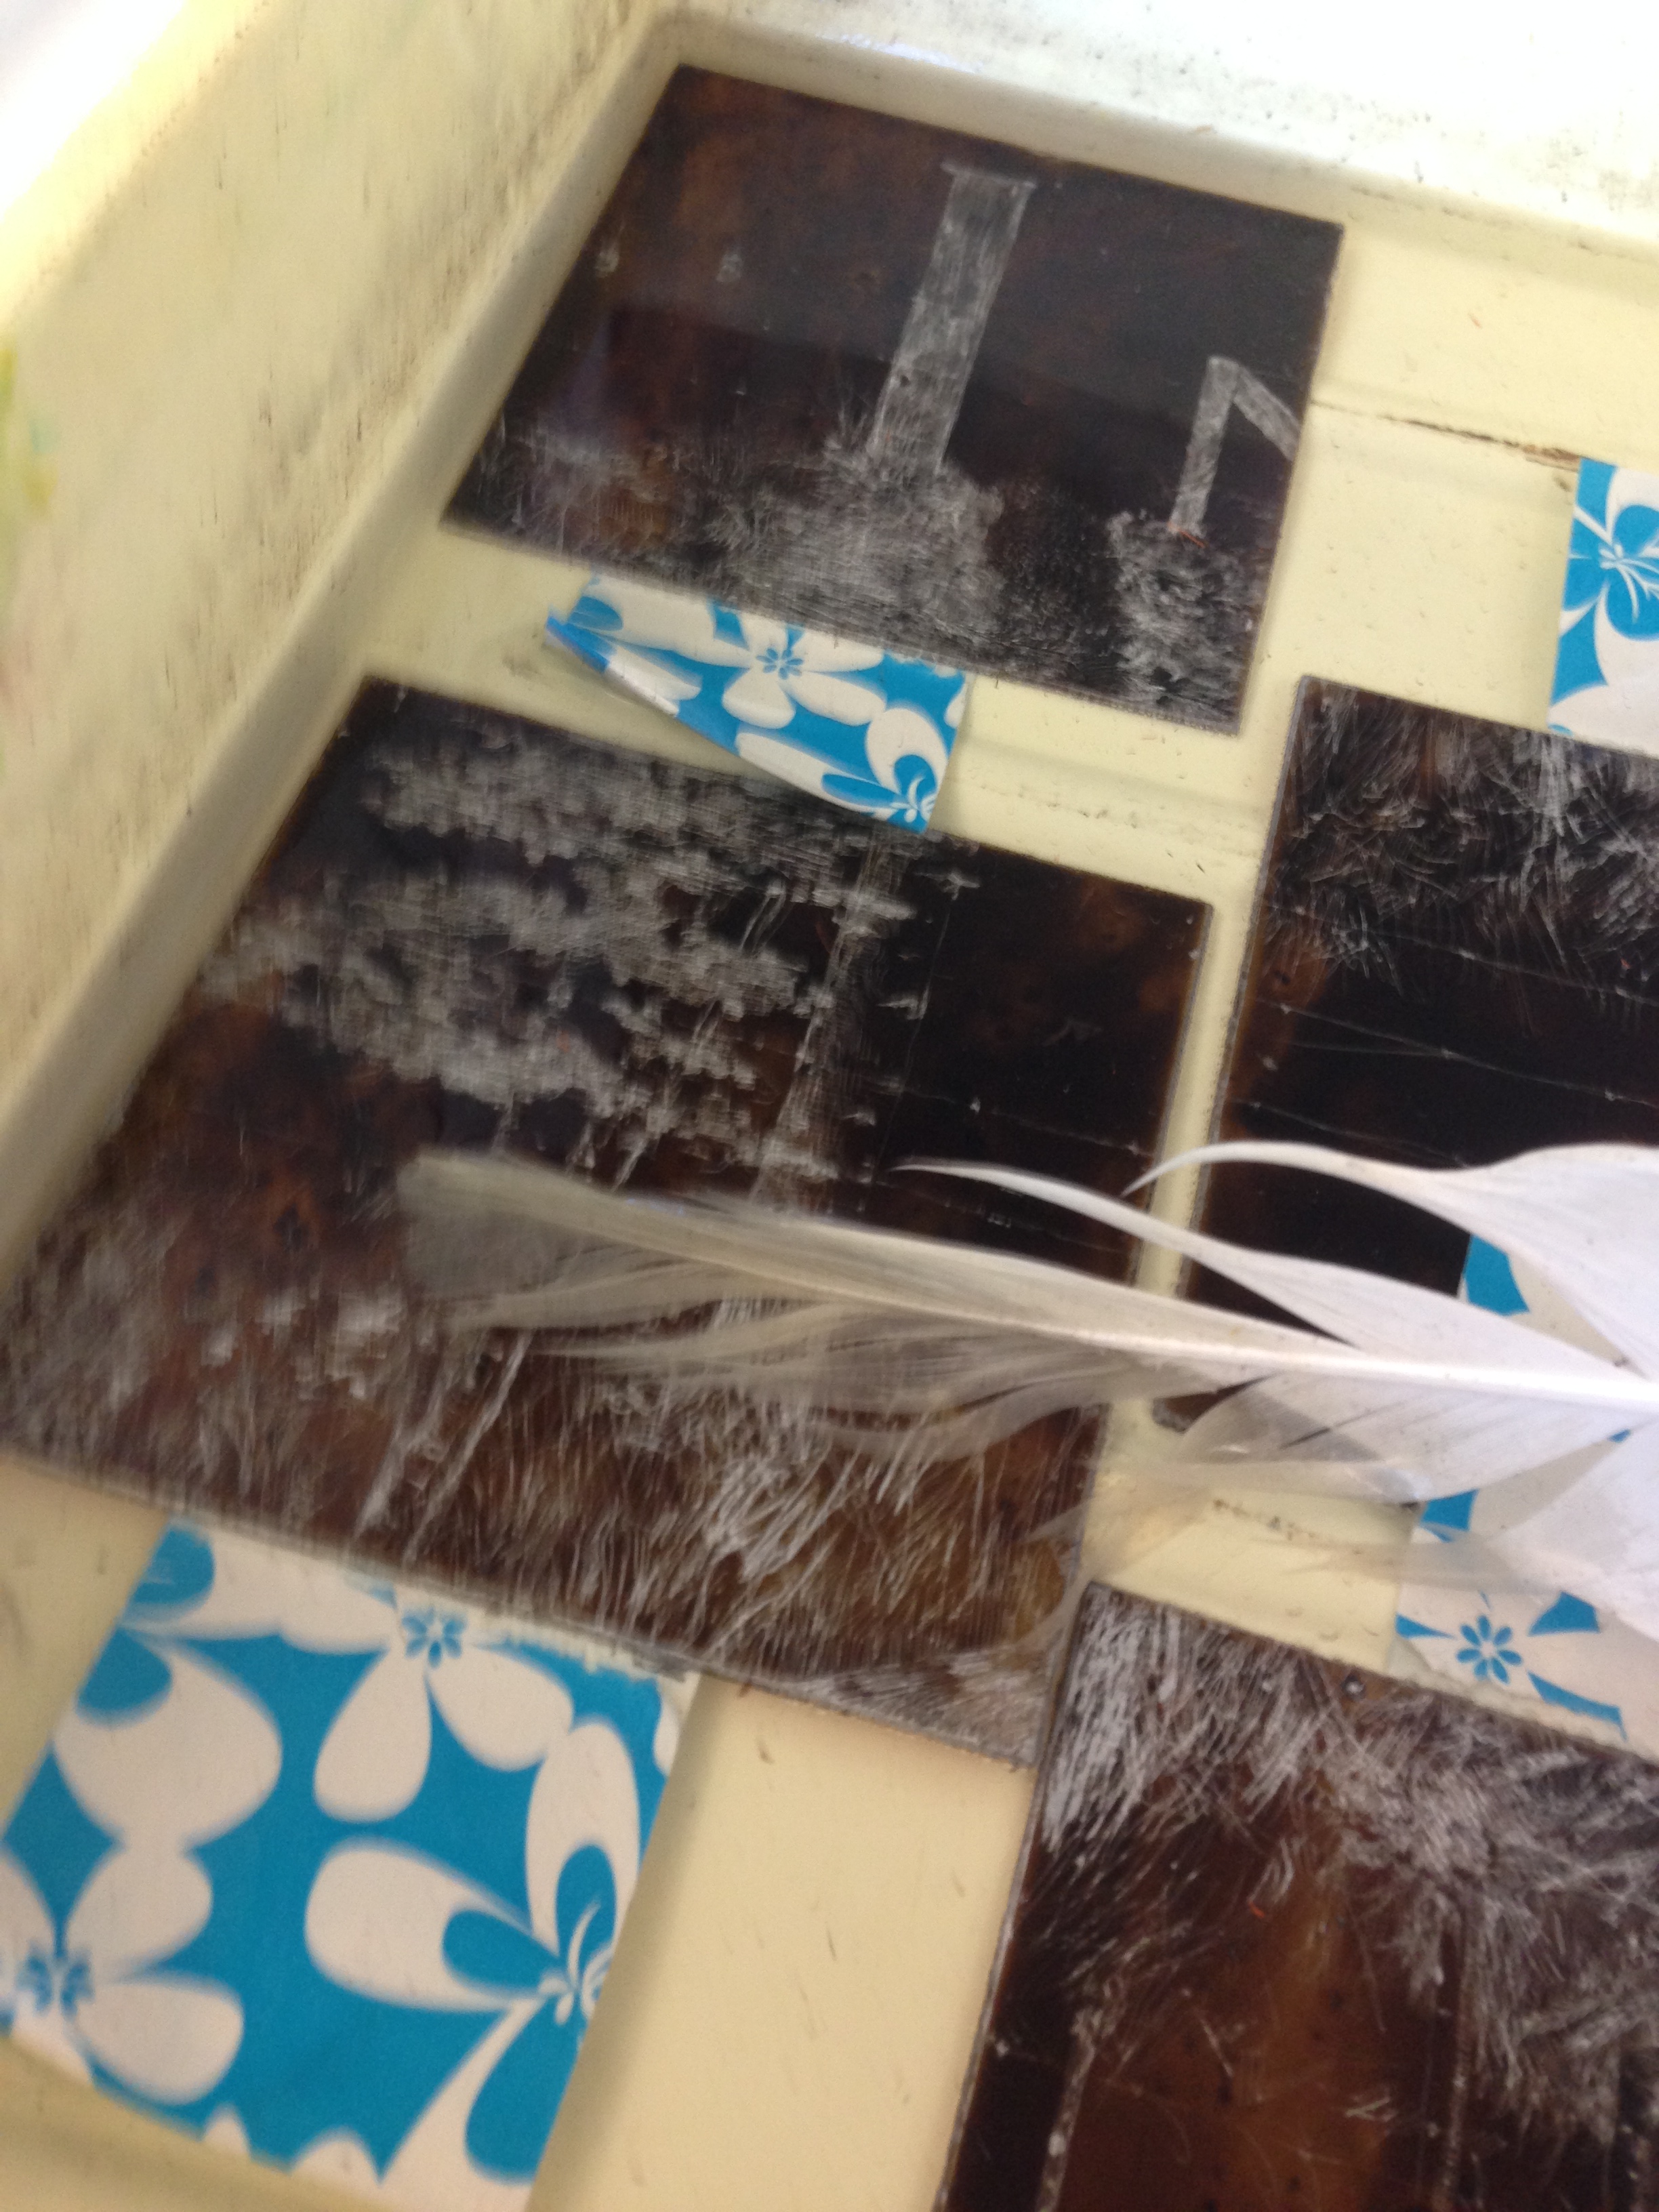
The turkey feather is not attached to a turkey at this point.
You'll notice none of the plates so far have a bear in them. I wanted to show the bear in a different way from its environment, so I chose to do it using a technique called aquatint. After taking the plates out of the acid, I wiped off the hard ground with mineral spirits. Then I took spray paint and covered all the plates with a thin spray. The spray paint does the same job as the hard ground, resisting the bite of the acid. But if you spray lightly, there will be an even but incomplete spread of paint across the surface; that means the acid eats away lightly, creating a soft tonal look, much like a halftone. I then had to mask off the rest of the surface with hard ground again so that only the bear would appear in aquatint. I put all the plates in the acid once more, this time for only 6 minutes.
The plates with a bear in front of the fence had to go in the acid a third time (with the bear covered in hard ground once more). I left out the fence and some of the foliage so that these would not appear to be in front of the bear, but had to etch these details after the bear was completed in aquatint.
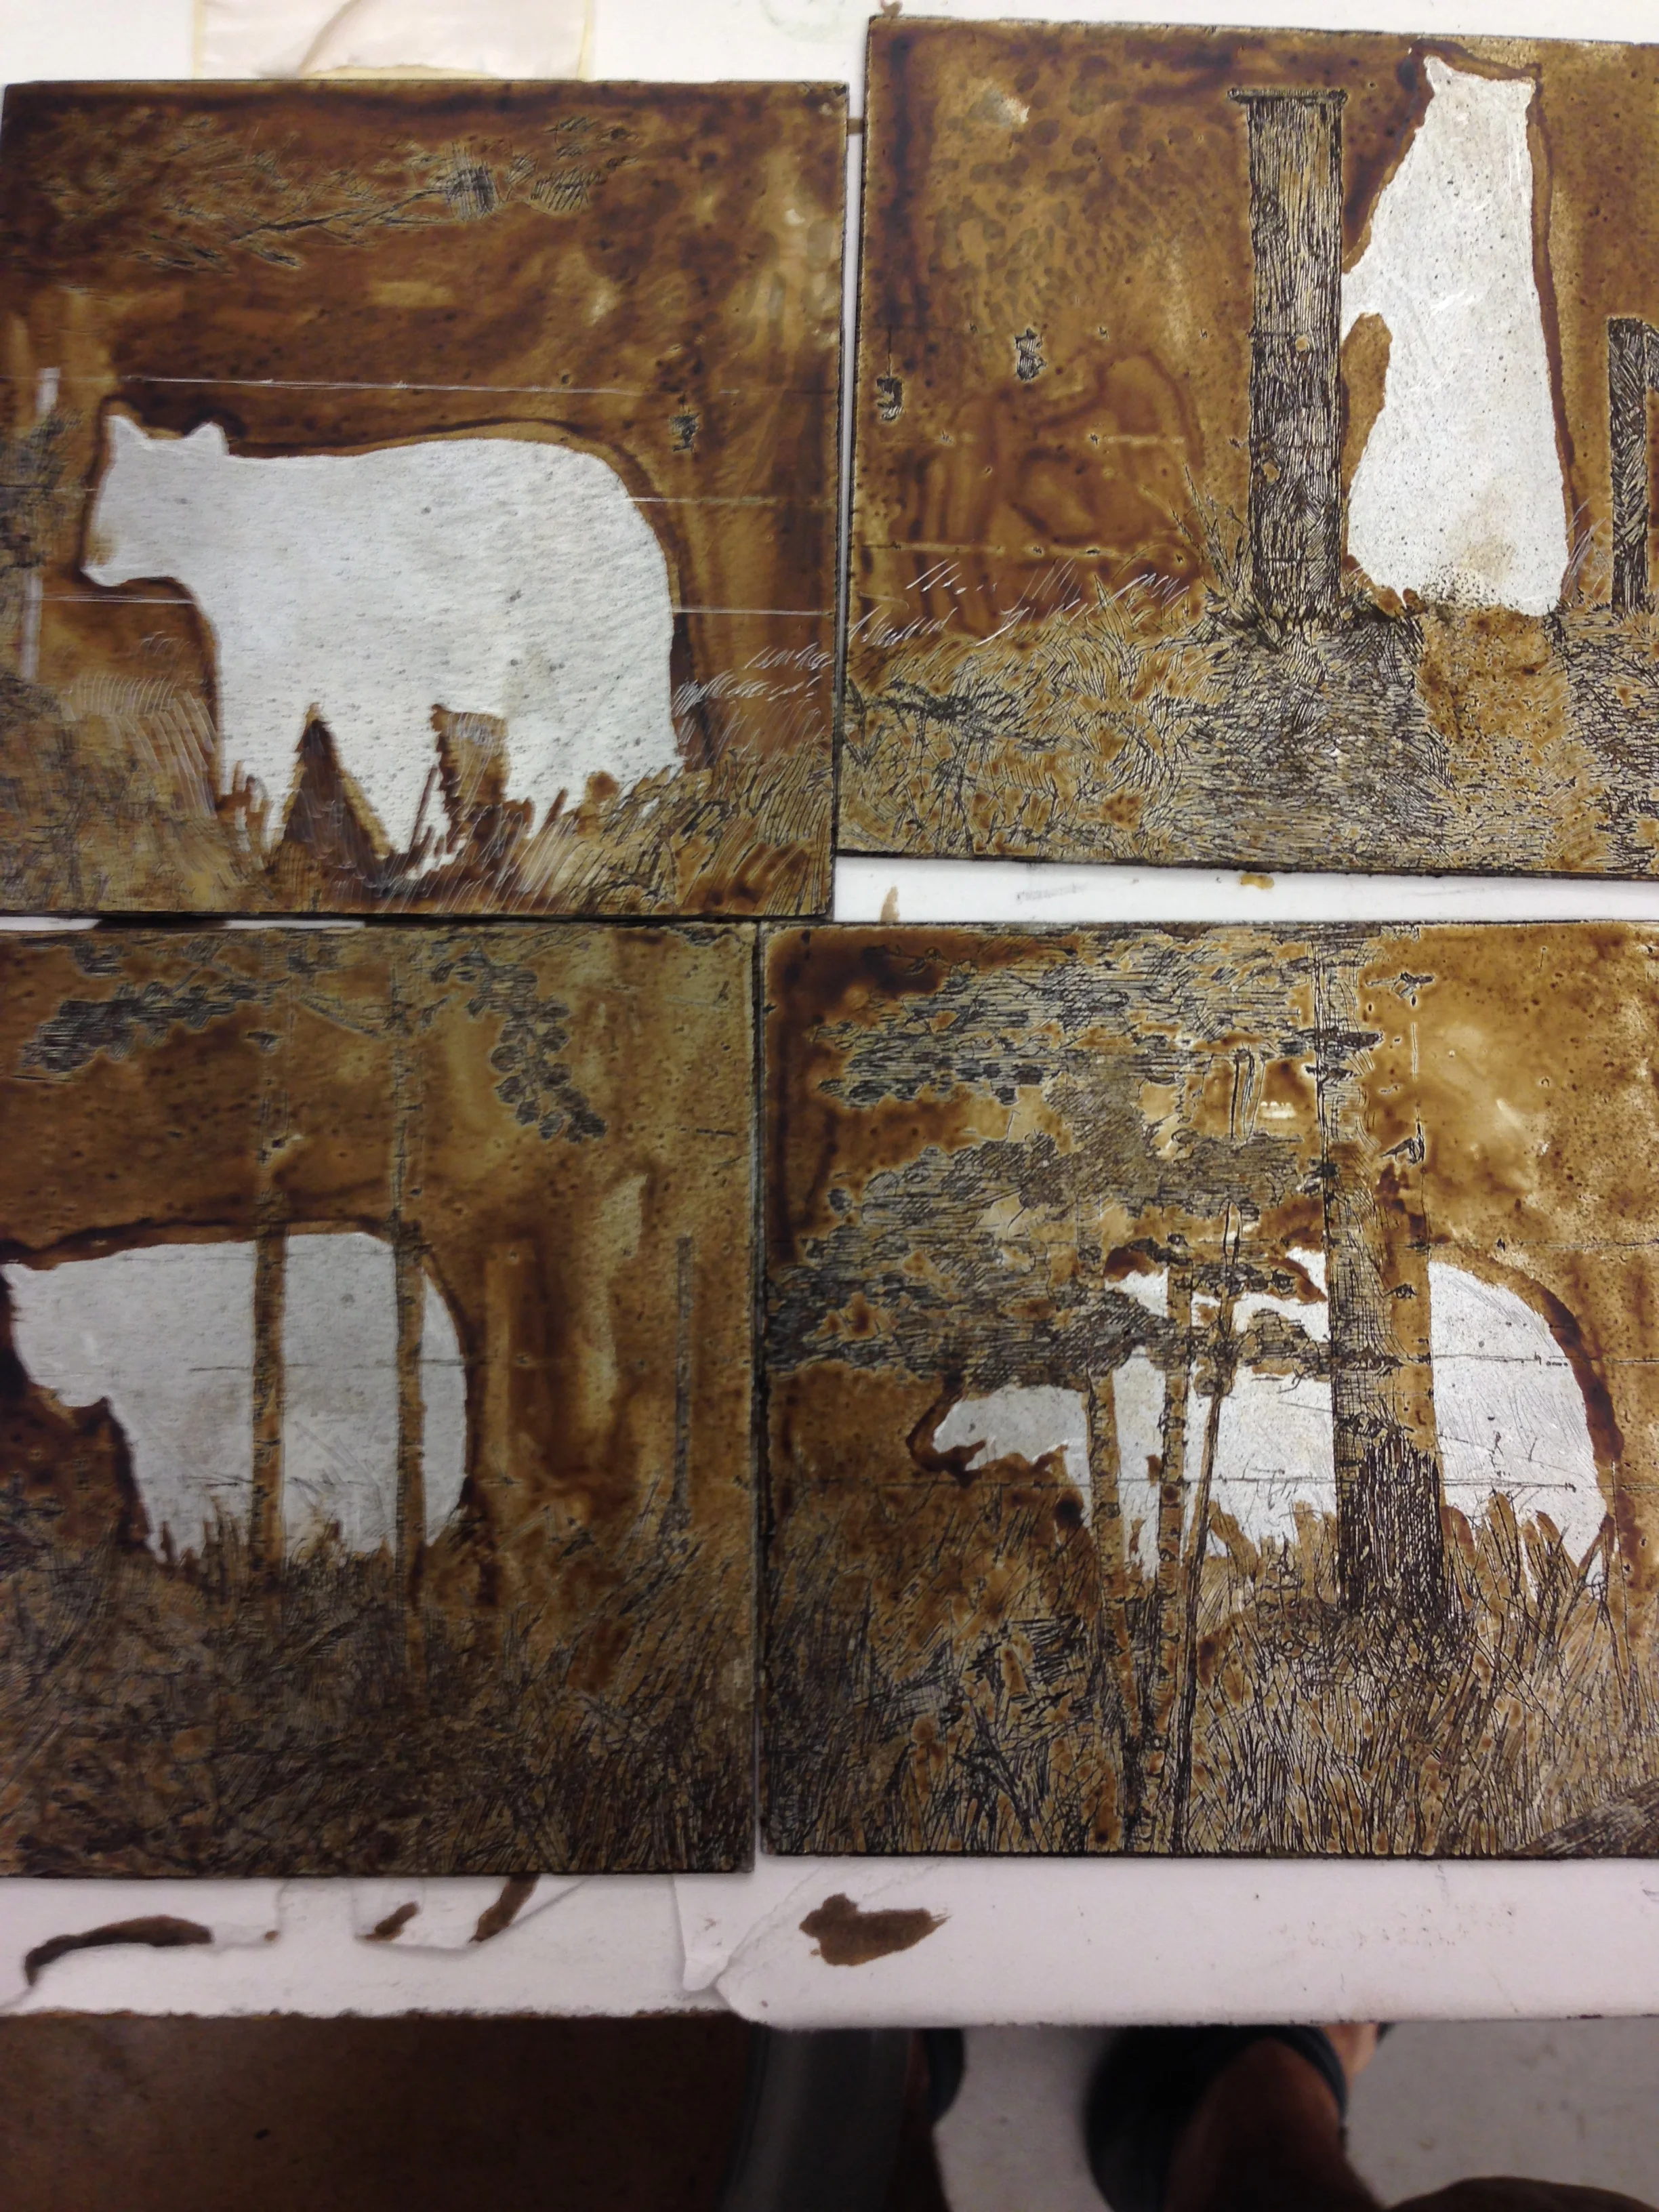
You can't see the spray paint because it's white. You can see my Chacos, though.
Once my plates were all etched, I had to soak the paper. This step was a tragedy. In any kind of etching, the paper has to be soaked in water and then slightly dried so that the paper will pick up all of the ink details from the grooves. Normally, you would soak the paper in a large container like the one in the left section of the picture below. My paper was too long, so I chose to soak it vertically in a clean trash can filled with water (the middle picture). I moved the bin and wrote an informative note which was apparently not clear enough. Another student accidentally threw away an inky paper towel, so I had to perform an emergency paper rescue. My paper received a small tear in the process, and I wasn't able to dry it as well as I wanted to. I'll admit in hindsight that using a trash can for any delicate process is a risky move.
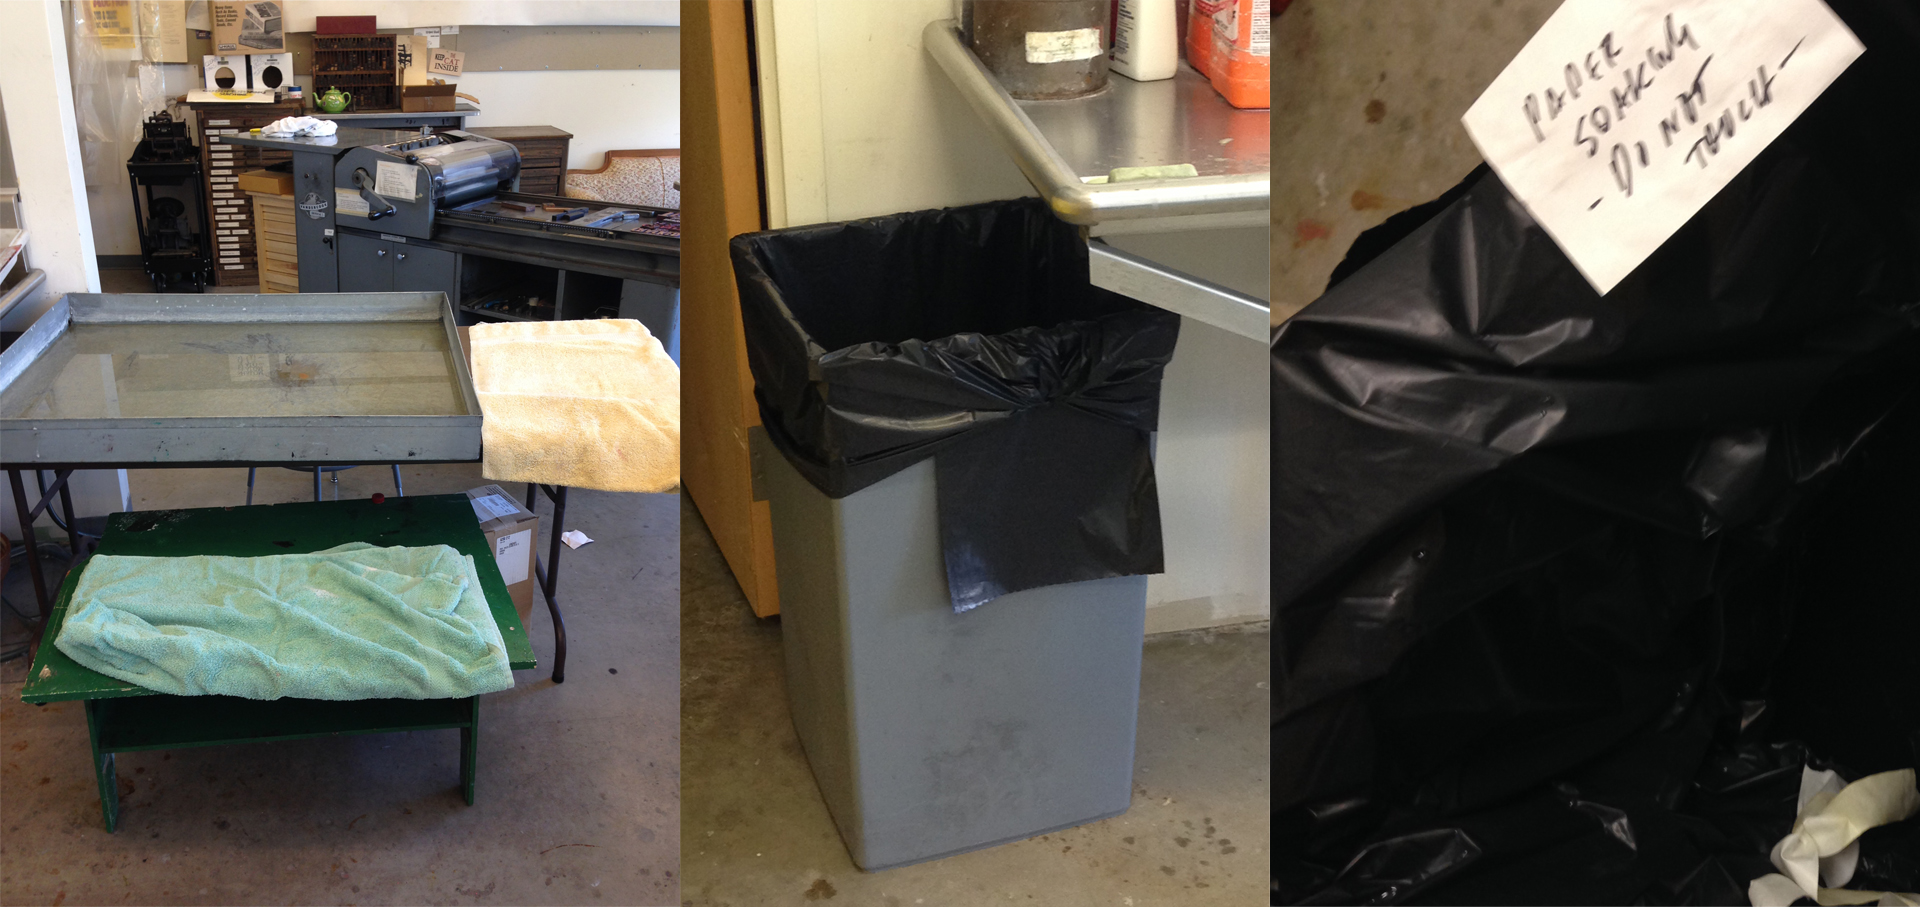
Note to self: notate more noticeably.
With my paper damp and my spirits low, I had to move on to the harrowing process of printing. My task was delicate: to carefully manipulate a damp piece of paper and lay it just right on the press bed so that the images printed cleanly with the right spacing.
First, after removing all of the hard ground and spray paint remaining, I inked up the plates. This involves wiping ink into the plate's grooves and then removing the ink off the surface with tarlatan and paper wipes. The big metal rollers will press the paper into the grooves of the zinc plate.
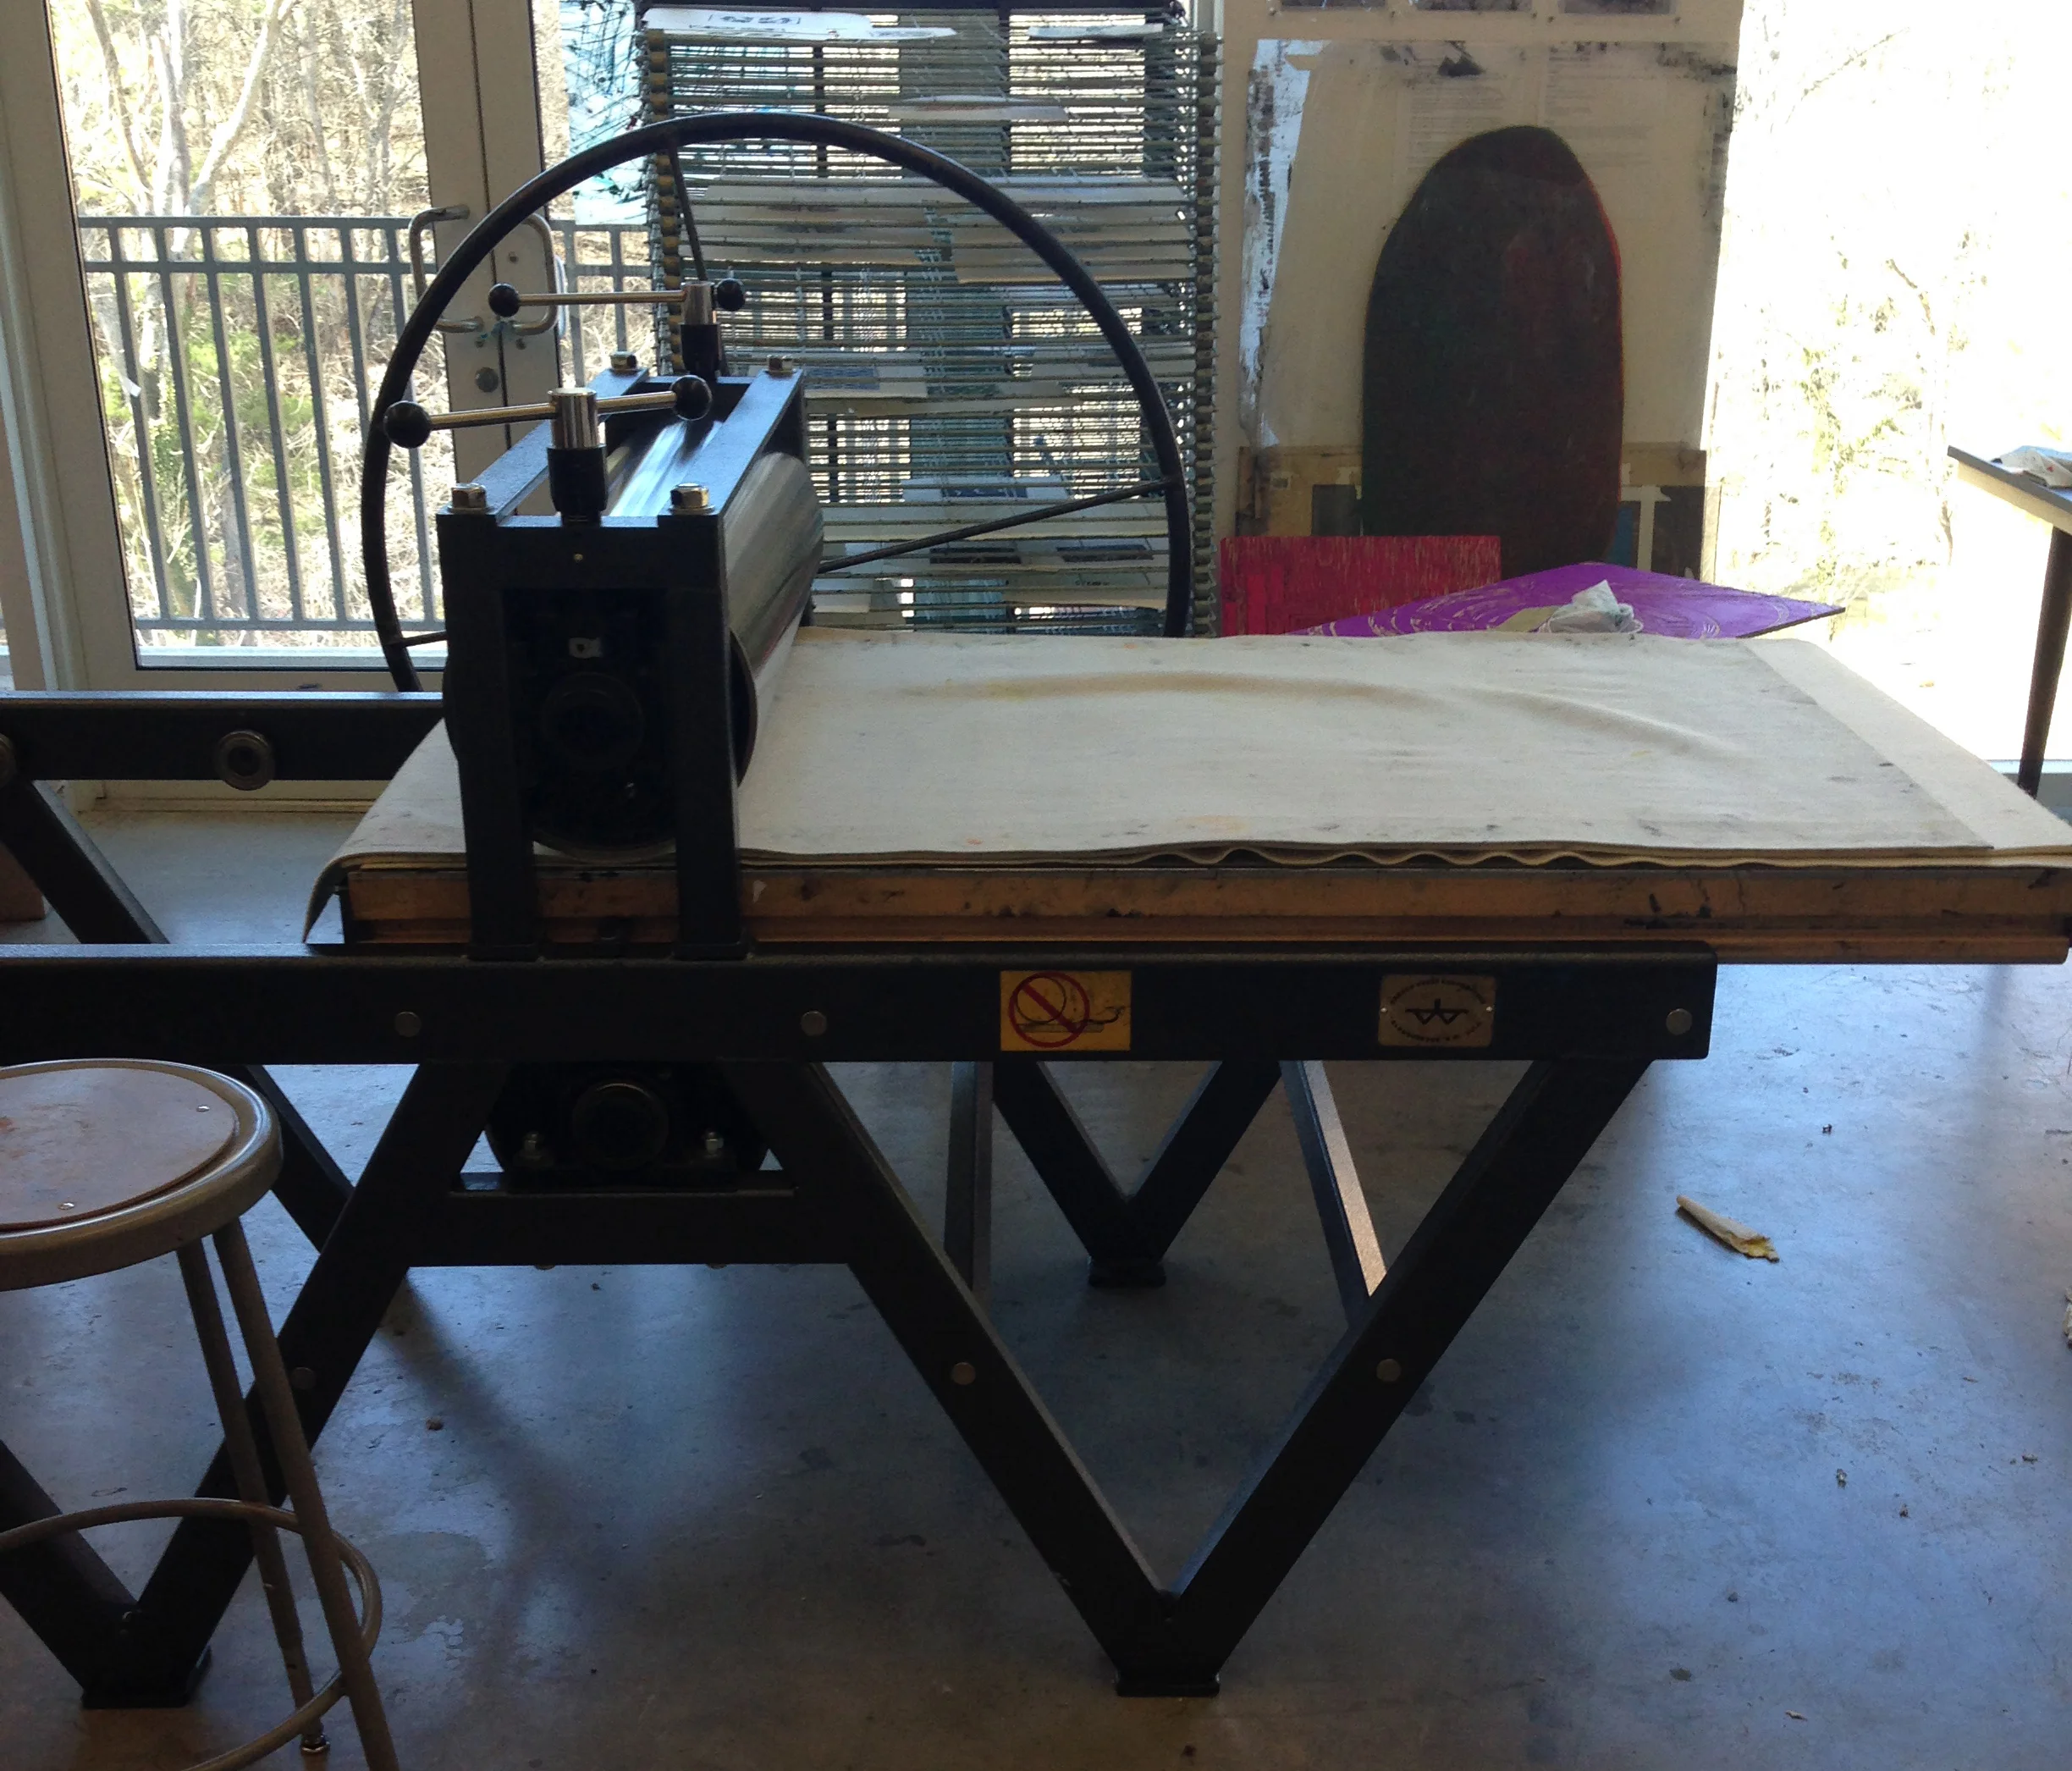
Meet the press.
You may be poor at judging distances, like I am. But that press bed, on which the paper and plates are laid down, is only about 80 inches long. Too short for my paper. I reasoned that the best way to print would be to tape down plates 1-5 on the bed, print those images, remove the paper and rotate it, replace plates 1-5 with plates 6-10, and print again.
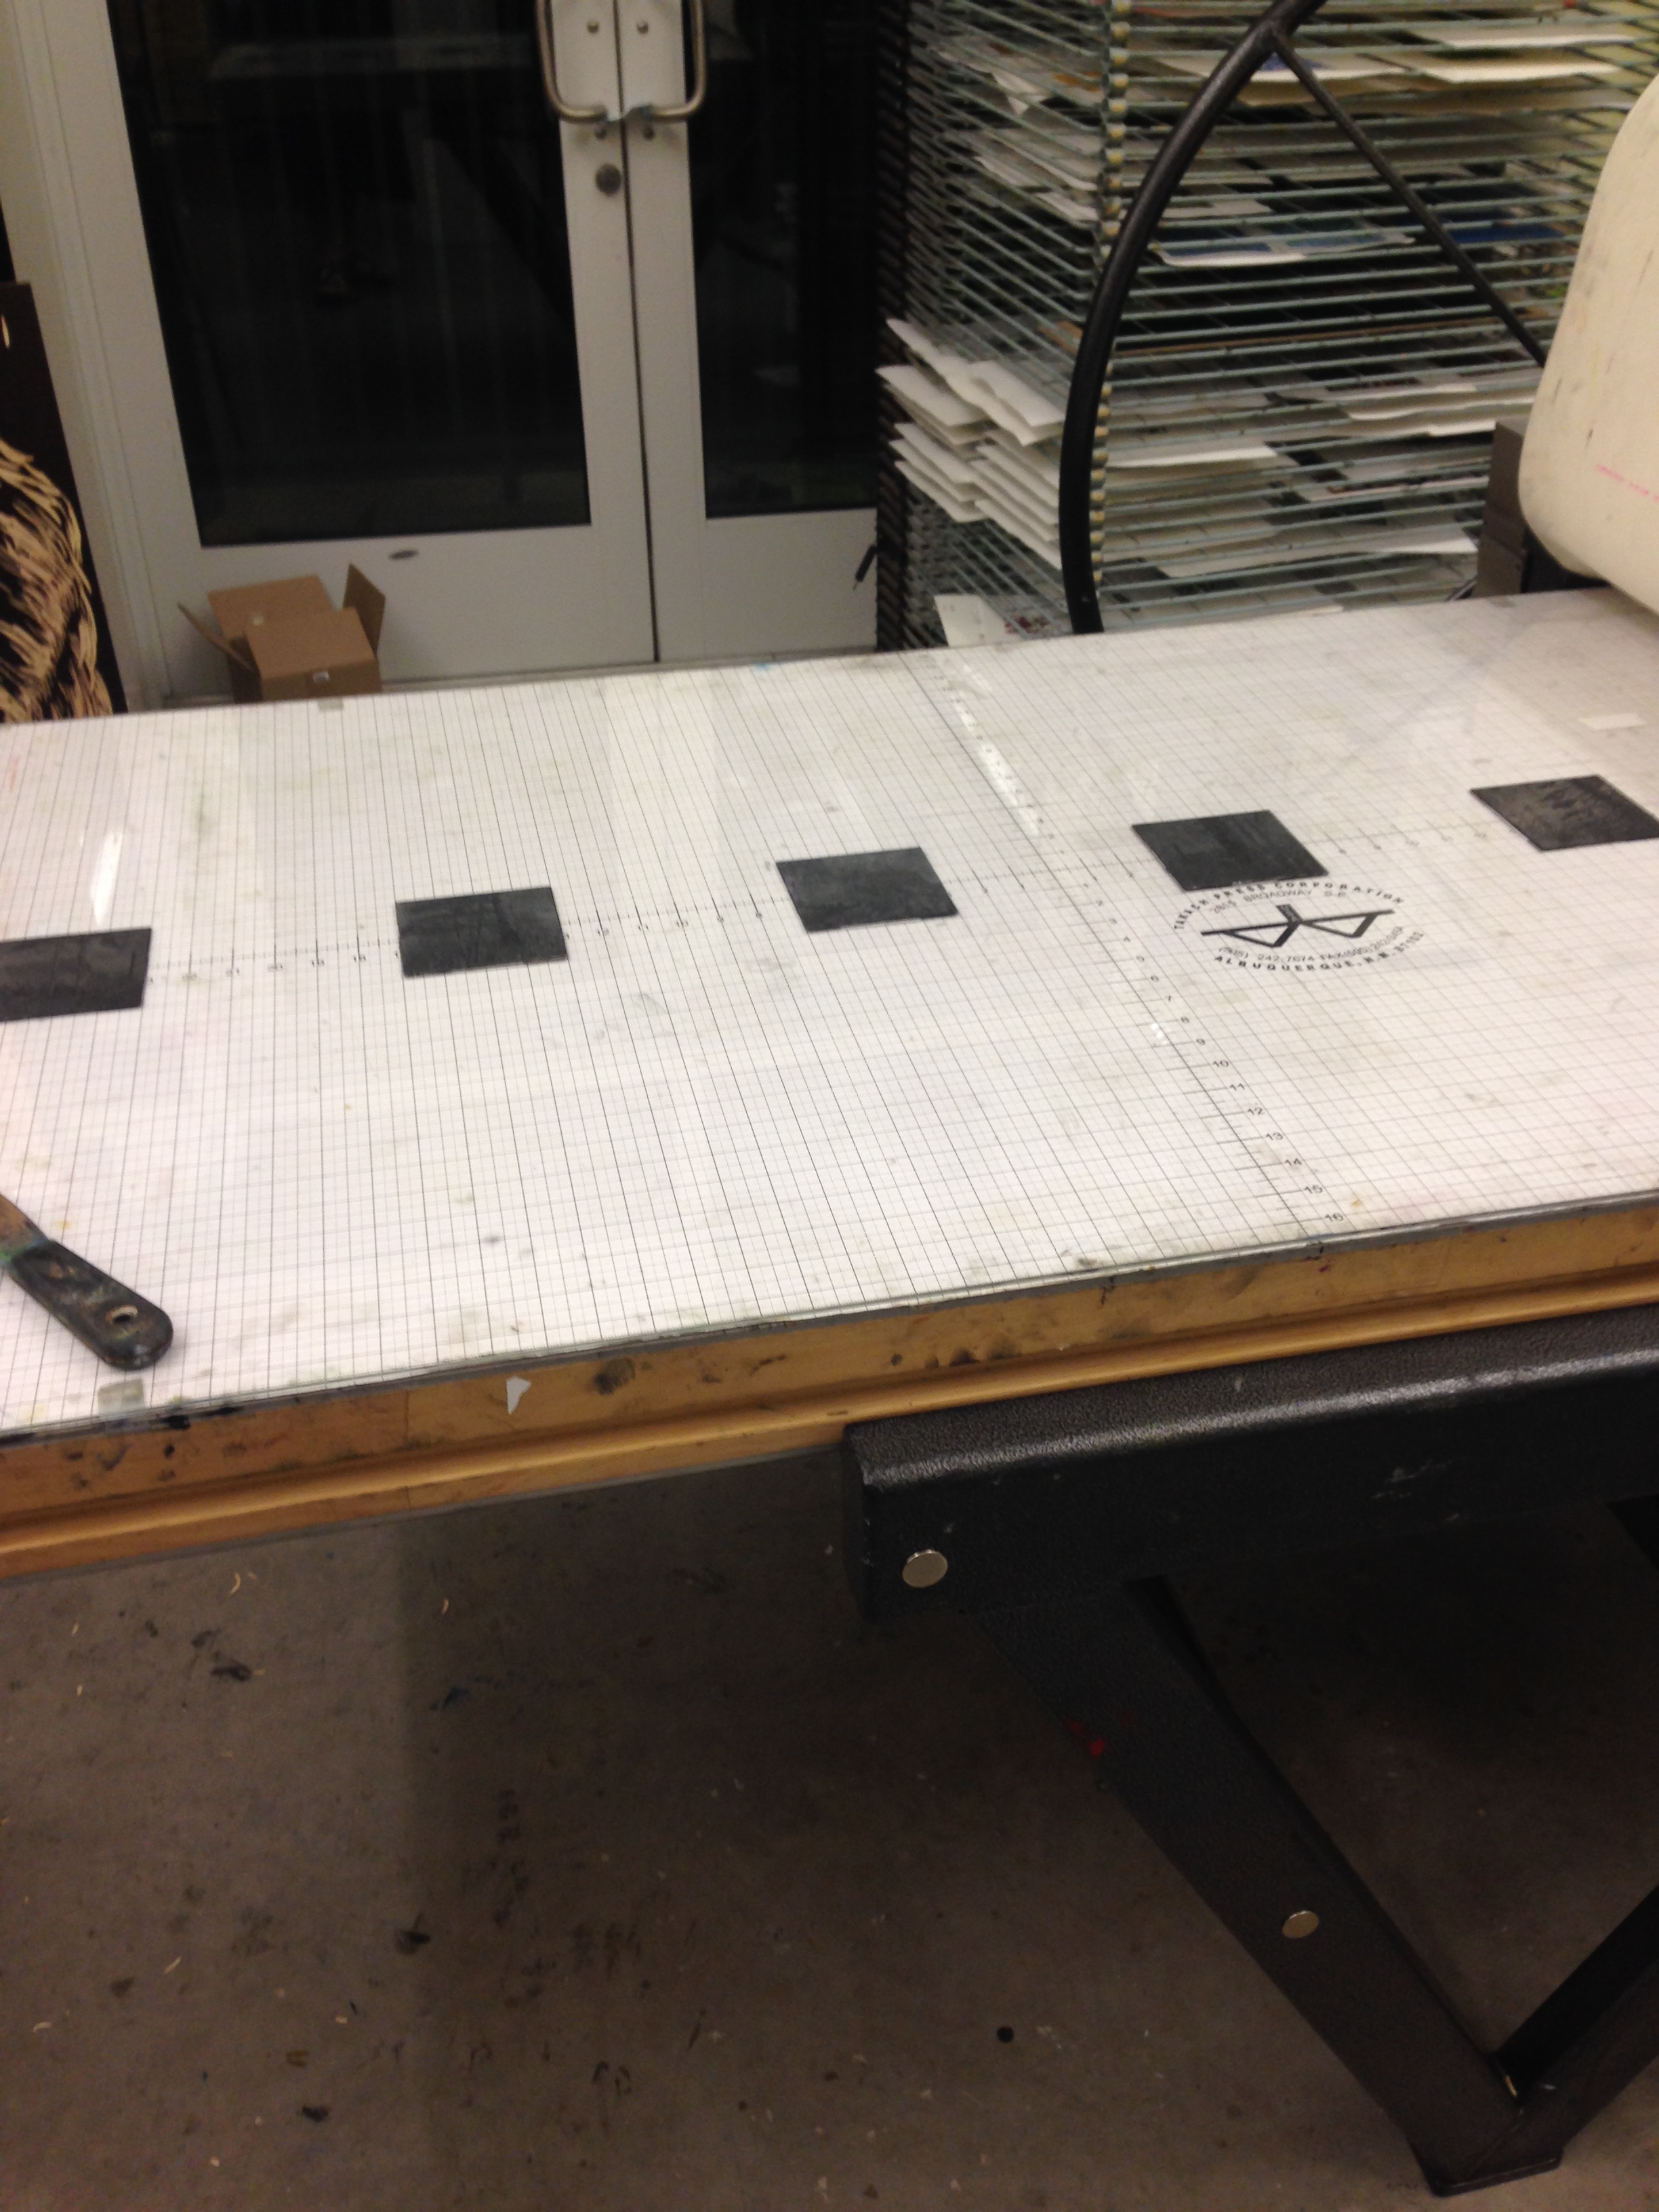
Plates 1-5 were taped down...
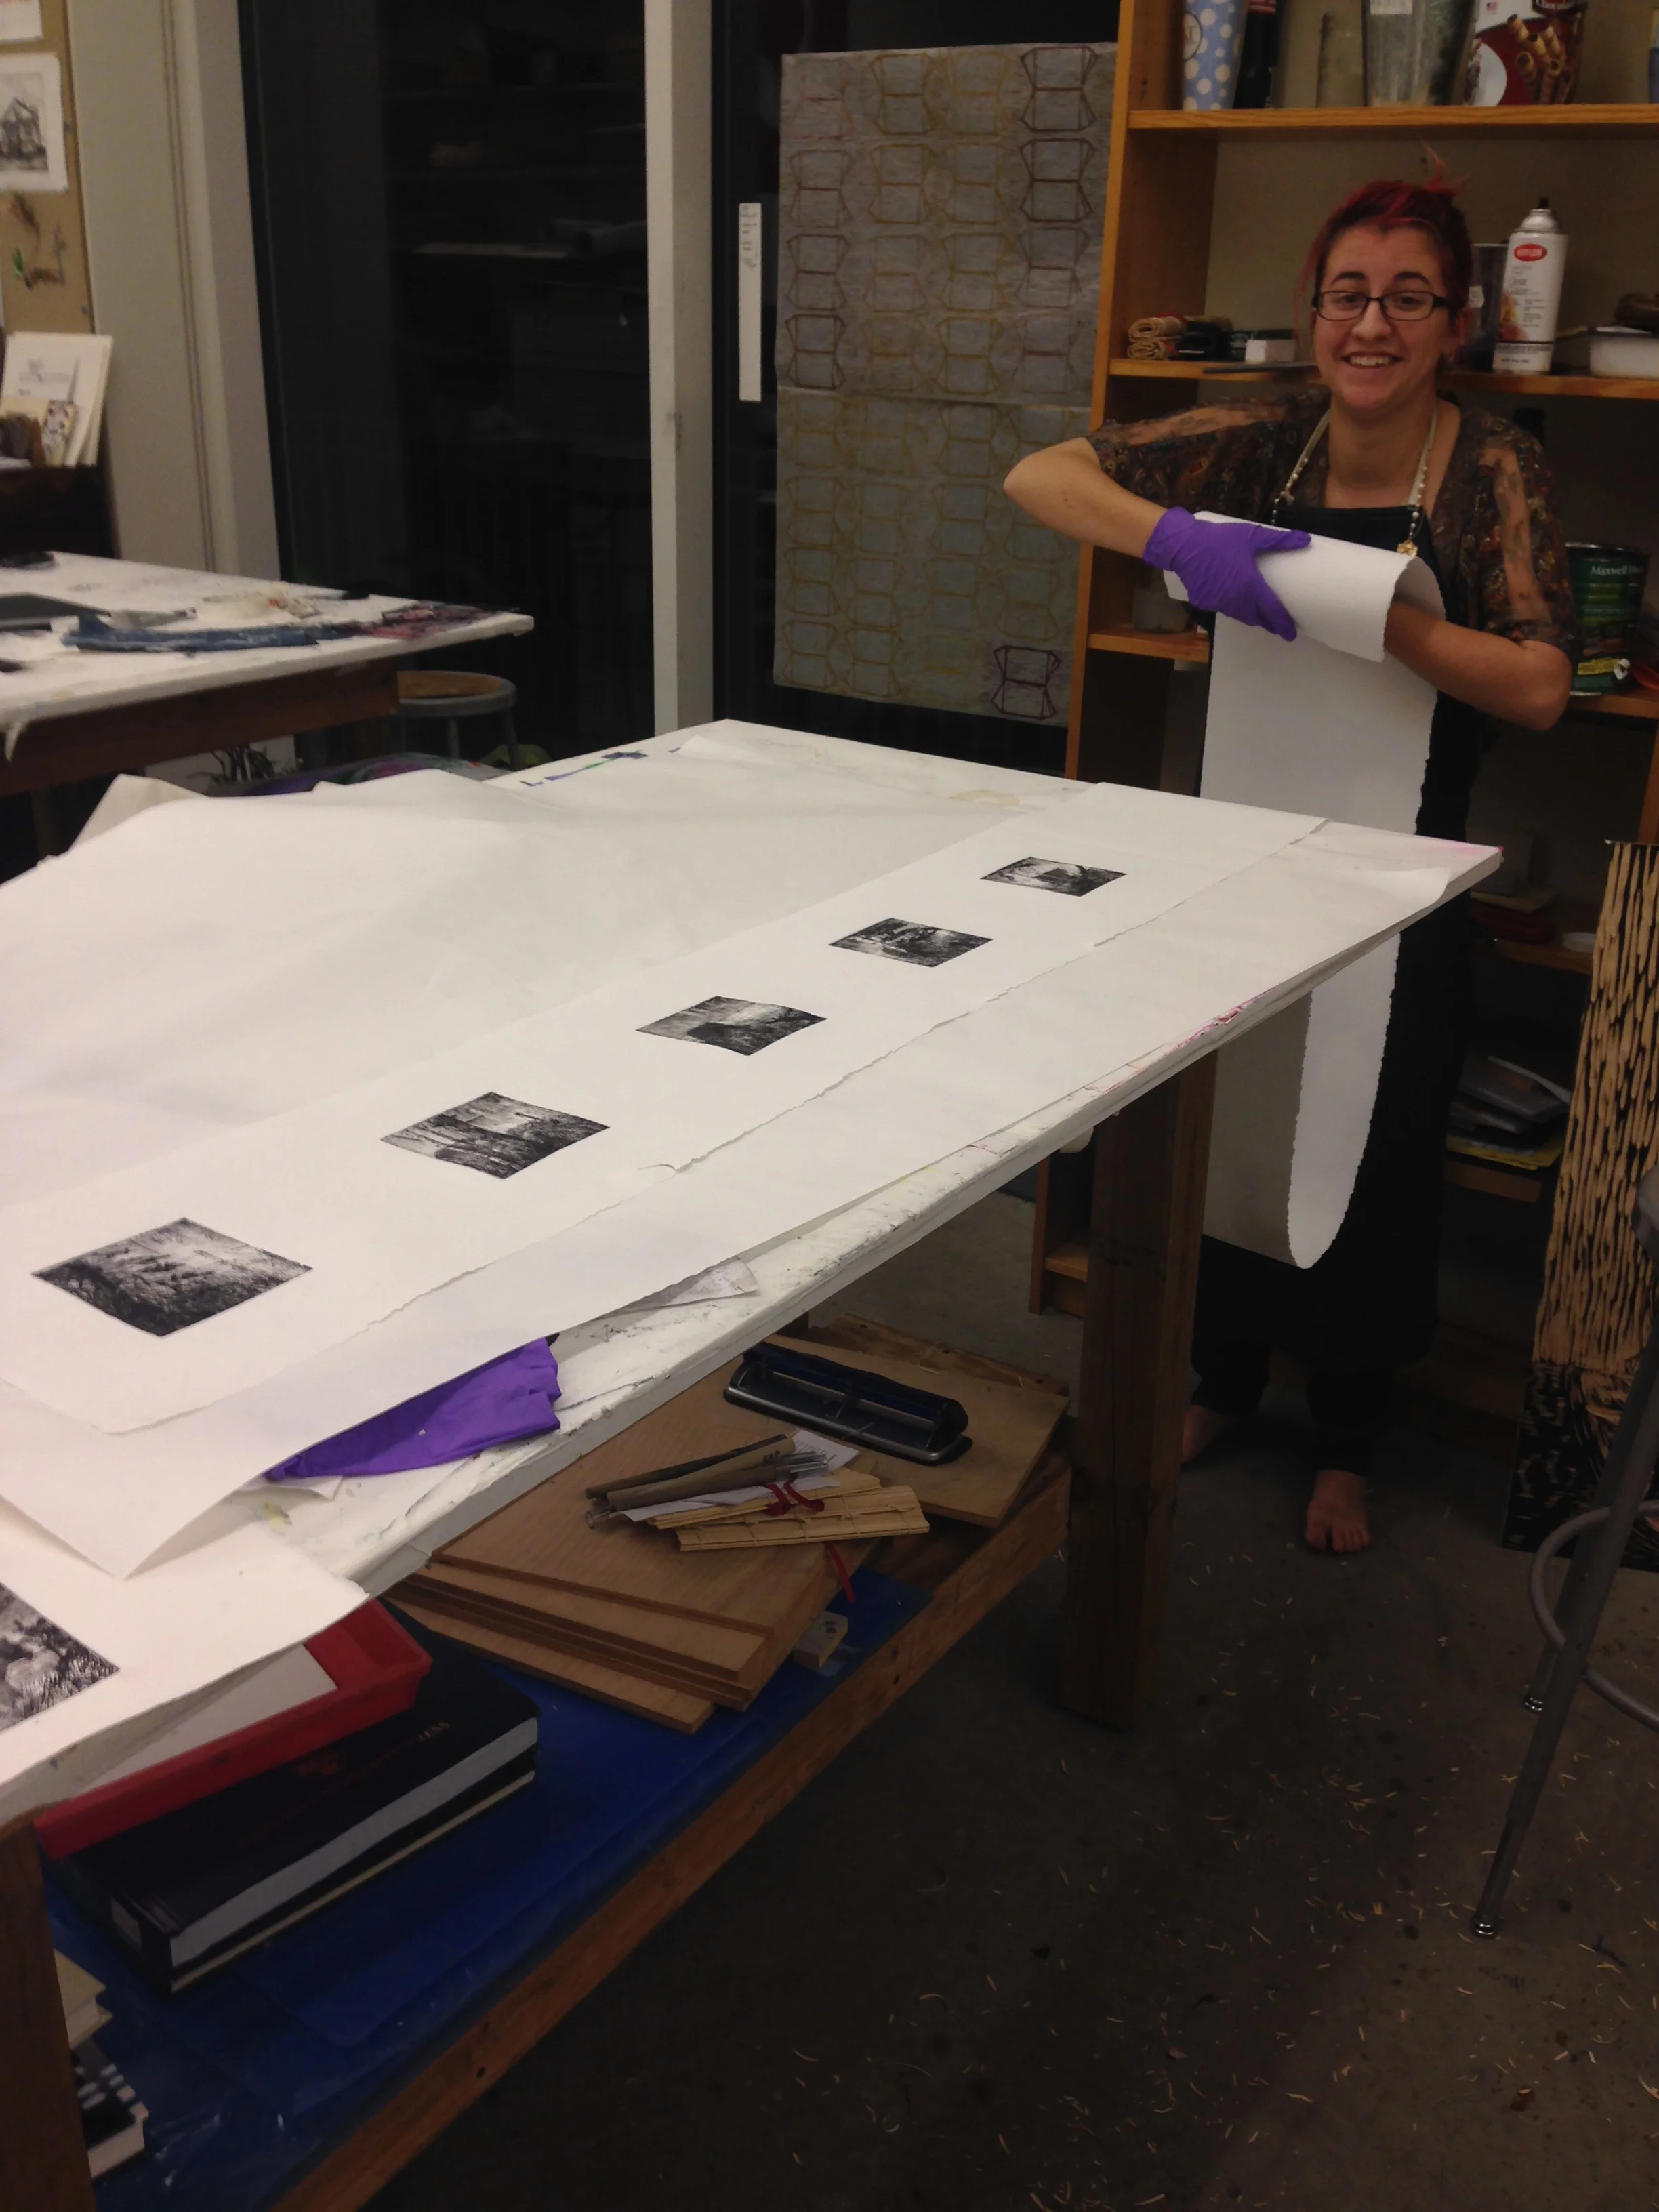
...and printed with the help of Amira, one of my artist friends.
I couldn't have printed without Amira's help. After we carefully place the paper and printed the first five, I ran the paper back through the press and removed it. We printed plates 6-10 the same way, rotating the paper and staying careful to keep the ink from smearing. At one point, it took three people to maneuver the half-printed image so that it wouldn't be ruined. After all the images were printed - cleanly, and with no hiccups - we left it to dry.

Pictured: a sigh of relief and a small tear that still frustrates me.
The actual printing took about thirty minutes in itself. The rest of the steps took much longer, but the result was truly satisfying.
The print is meant to hang so that the viewer has to walk along and take in each frame, or 'window,' on its own. The bear is obvious in some plates and almost completely obscured in others, so it takes the whole print for the scene to unfold. A few of the final images are below. To see clear pictures of all the prints, go to the section on my website called "The Bear."